
Easyfix Glue & Screw System
Looking for the original, high-performance alternative to Snapfix or Simplefix? You’ve found it. Ropro invented the Easyfix letter locator system back in 1986, and we have been perfecting it in the Netherlands ever since. Our Glue & Screw system is specifically designed for professionals who know that cheap imitations don't last on a façade. Choose the original for unmatched UV-resistance and precision. Explore our range and discover why the world’s leading sign makers have trusted Ropro for over 40 years.


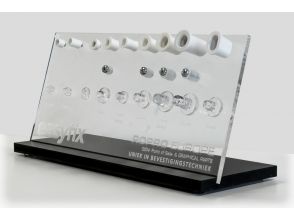
Letter Fixings — Also known as letter locators
Explore the professional range of Letter Fixings at Ropro Europe and find the perfect Easyfix locator for mounting façade lettering. Ropro Europe is the proud inventor and manufacturer of this unique system. Since 1986, we have been producing these systems in the Netherlands under strict quality standards. Professional sign makers know the difference between our original system and low-cost imitations. Looking for fixings for signs and panels? We offer those as well.
The original letter fixing system — Accept no imitations
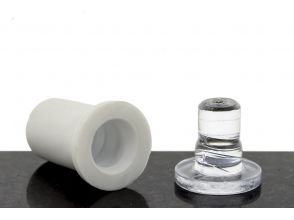
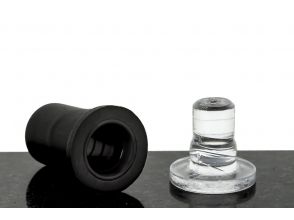
Looking for Snapfix or Simplefix? Why settle for a copy when you can get the original? The Easyfix Glue & Screw system (M+F) consists of two parts. The Easyfix Male component is glued to the back of the letter, and the Easyfix Female component is mounted to the wall. Use our Rody Rapid Kleber for bonding plastic to plastic. For bonding plastic to metal (Dibond or Aluminium), use our two-component adhesive: Rody Power Bond. Always use stainless steel screws. Tighten until seated, then back off a quarter turn. This compensates for any surface irregularities and prevents unnecessary stress caused by thermal expansion and contraction.
Know your components

Easyfix Male

Easyfix Female
How to mount letters at a distance from the wall?
INSTALLATION INSTRUCTIONS FOR EASYFIX LETTER FIXINGS
Gluing the Easyfix Male component to the letter
If the letter has a protective film, remove it first. Use our Rody Rapid Cyanoacrylate for bonding the male component to plastic letters such as acrylic (Perspex), PVC, and polycarbonate. For bonding to Dibond or other metal surfaces, we recommend using our 2-component adhesive.
Before you start, always lightly sand the surfaces to be bonded. Clean the surface thoroughly and degrease if necessary with a silicone-free cleaner. Mark on the letter where the fixings should be placed. Use a locator every **10cm**.
Apply a drop of glue to the male locator and press it onto the letter. Alternatively, apply the glue to the letter and press the locator onto it. Note: cyanoacrylate is very thin and bonds almost instantly. For an even faster bond, you can use our activator.


Mounting template and marking the holes
Create a mounting template or drilling guide using cardboard, thin board, or sturdy paper. Place the letters accurately and straight onto the template and press them firmly so that the locators leave an imprint. This way, you know exactly where to drill the holes for the female components on the wall.
Façade mounting preparation
Clean the façade if necessary. Position the mounting template/drilling guide against the wall. Use a **spirit level** to ensure the letters are perfectly straight. Drill the holes at the indicated points on the wall.


Mounting Easyfix Female components to the wall
For a secure fix into the wall, we recommend using Fischer Duopower plugs. Screw the female locators onto the wall using stainless steel pan head screws. Tighten the screw by hand with a screwdriver and then **turn back a quarter turn**. This corrects minor alignment differences and prevents unnecessary tension caused by expansion and contraction.
Placing the letters on the façade
Carefully snap the letters into the Easyfix locators on the wall and press firmly. Check if all letters are correctly positioned. Clean the wall and the mounted letters again to remove any dust, dirt, or fingerprints. This ensures a professional and clean appearance of your perfectly spaced façade signage.

Which model do I need?
This depends on the letters you want to mount. Large letters require large locators. The largest variants are the Easyfix Super (30mm wall distance) and the Easyfix Extra Large (25mm wall distance). Letters with a narrow stroke width require Easyfix locators with a small diameter, such as the Midi 10 or Midi 15 series with a 9mm diameter. Also suitable for logos.
